

Hey there! As a supplier of Horizontal Remote Radiators, I'm super excited to walk you through the installation process of these nifty devices. Whether you're a DIY enthusiast or a professional in the field, understanding how to install a Horizontal Remote Radiator can save you time, money, and headaches down the road. So, let's dive right in!
Step 1: Preparation
Before you start the installation, it's crucial to gather all the necessary tools and materials. You'll need a wrench set, screwdrivers, a level, a drill, and some basic plumbing supplies like hoses and clamps. Make sure you have the installation manual handy, too, as it'll serve as your go-to guide throughout the process.
Next, choose the right location for your radiator. The ideal spot should be well-ventilated, away from direct sunlight, and close to the power source and the equipment that needs cooling. Keep in mind that the radiator needs enough space around it for proper air circulation. Measure the area to ensure it can accommodate the size of the radiator you've purchased.
Step 2: Mounting the Radiator
Once you've found the perfect location, it's time to mount the radiator. Start by attaching the mounting brackets to the wall or the frame where you'll be installing the radiator. Use a level to make sure the brackets are perfectly horizontal. This step is crucial because an unevenly mounted radiator can lead to poor performance and even damage over time.
After securing the brackets, carefully lift the radiator and place it on the brackets. Make sure it's properly aligned and centered. Then, use the provided screws or bolts to fasten the radiator to the brackets. Tighten them securely, but be careful not to over-tighten, as this could damage the radiator or the mounting brackets.
Step 3: Connecting the Hoses
Now that the radiator is mounted, it's time to connect the hoses. First, identify the inlet and outlet ports on the radiator. These are usually labeled on the radiator itself. Then, connect the hoses from the equipment that needs cooling to the corresponding ports on the radiator. Use hose clamps to secure the hoses in place and prevent any leaks.
Make sure the hoses are routed in a way that they don't kink or get pinched. Kinked hoses can restrict the flow of coolant and reduce the efficiency of the radiator. If necessary, use hose guides or clips to keep the hoses in place and ensure a smooth flow of coolant.
Step 4: Electrical Connections
Most Horizontal Remote Radiators require an electrical connection to power the fan and other components. Before making any electrical connections, make sure the power is turned off to avoid any electrical shocks.
Locate the electrical terminal on the radiator and connect the power cable according to the manufacturer's instructions. If you're not comfortable working with electricity, it's best to hire a qualified electrician to do this step for you. Once the electrical connection is made, turn on the power and test the radiator to make sure the fan is running properly.
Step 5: Filling the Coolant
After the hoses and electrical connections are made, it's time to fill the radiator with coolant. Refer to the installation manual for the recommended type and amount of coolant to use. Slowly pour the coolant into the radiator until it reaches the recommended level. Be careful not to overfill, as this can cause the coolant to spill out and create a mess.
Once the radiator is filled with coolant, start the equipment that needs cooling and let it run for a few minutes. This will allow the coolant to circulate through the system and remove any air bubbles. Check the coolant level again and add more if necessary.
Step 6: Testing and Adjustment
With the radiator installed and filled with coolant, it's time to test the system. Start the equipment and monitor the temperature. The radiator should start cooling the equipment effectively, and the temperature should gradually decrease.
If you notice any issues, such as a leak, unusual noise, or poor cooling performance, stop the equipment immediately and check the installation. Make sure all the connections are secure, the hoses are properly routed, and the coolant level is correct. If you're unable to resolve the issue on your own, contact the manufacturer or a professional technician for assistance.
Step 7: Maintenance
Once the radiator is installed and working properly, it's important to perform regular maintenance to keep it in good condition. This includes checking the coolant level regularly, inspecting the hoses for any signs of wear or damage, and cleaning the radiator fins to remove any dirt or debris.
Regular maintenance will not only extend the lifespan of the radiator but also ensure that it continues to operate efficiently. Refer to the manufacturer's instructions for the recommended maintenance schedule and procedures.
Conclusion
Installing a Horizontal Remote Radiator may seem like a daunting task, but with the right tools, materials, and a little patience, it can be a straightforward process. By following the steps outlined in this blog post, you'll be able to install your radiator correctly and enjoy its cooling benefits for years to come.
If you're in the market for a Horizontal Remote Radiator, we're here to help. Our radiators are designed to provide efficient cooling solutions for a wide range of applications. You can learn more about our products by visiting our website Horizontal Remote Radiator.

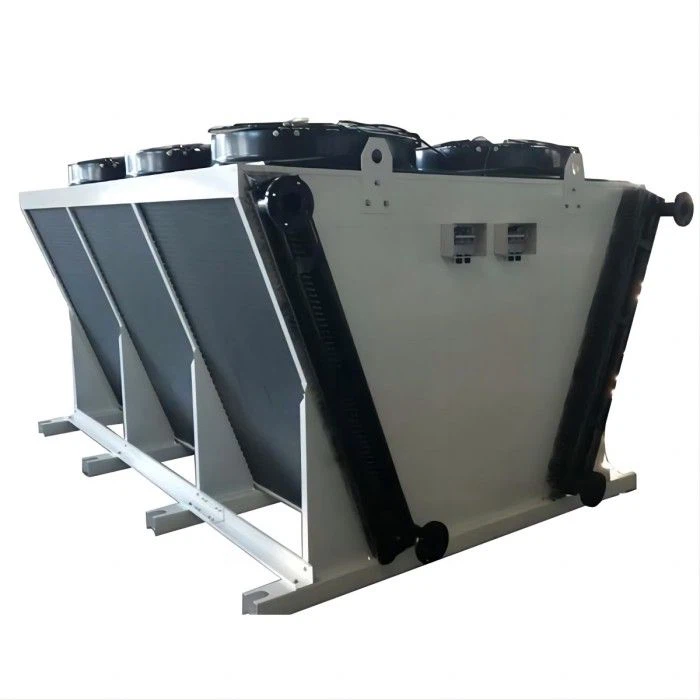
We also offer other generator auxiliary systems, such as Cooling Towers for Diesel Generator Sets and Remote Monitoring for Generator Sets. If you have any questions or would like to discuss your specific requirements, feel free to reach out to us. We're always happy to help you find the right solution for your needs.
References
- Manufacturer's Installation Manual for Horizontal Remote Radiators
- Industry Standards for Radiator Installation and Maintenance


